![]()
|
"How-To
Projects"
|
|
| --- CONTROLLERS --- | |
|
Modified Atari 2600 Paddle "Pong"
Controller
by Rob Mitchell ed. Brett Walach |
With the Atari 2600 Paddle controller you can play games like Hyperchase, Vectrace, Vaboom!, and the analog version of Spike's Water Balloons with greater accuracy than the standard Vectrex controller. Improve your scores, diversify your gaming strategy, and add another peripheral to your Vectrex collection! The following description shows you how to make a "pong" type controller for the Vectrex from a standard Atari 2600 paddle. |
|
Components Needed Atari 2600 paddle |
|
|
Principle of Design For this project the Atari potentiometer is wired to control the X-axis for input to the Vectrex. What this does is split the +5V and -5V supply for interpretation by the DAC circuitry inside. The paddle button is wired (mapped) to work as Vectrex button #4. |
|
|
Time Required This project should take you all of 10 minutes. ;) |
|
|
BUILD IT - STEP BY STEP |
|
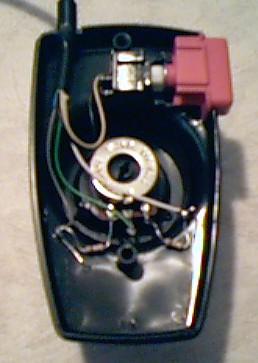 |
After opening up a standard Atari 2600 paddle and scrapping the existing cable, solder one end of the two 100k resistors on the first and third solder points of the potentiometer. |
|
Vectrex Plug |
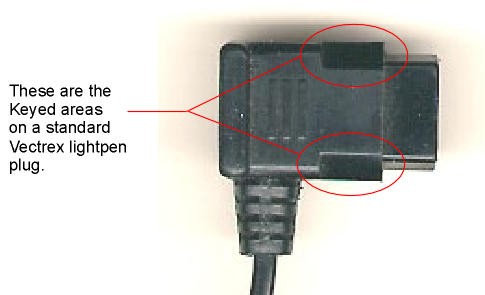
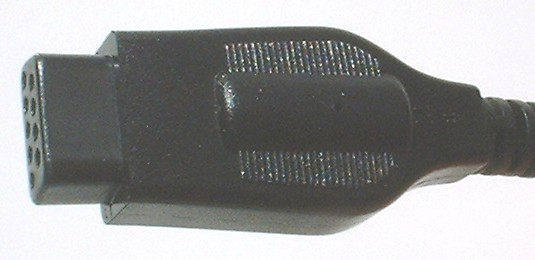
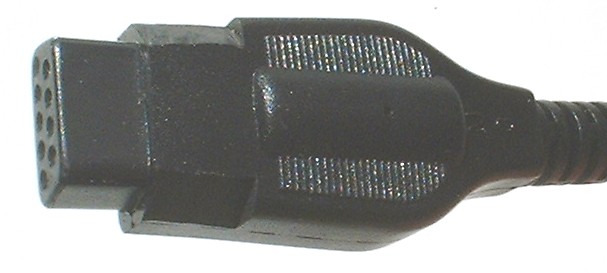
Cut off the male plug end of the Sega Genesis extension cable (the one with the pins), and strip back enough insulation to reveal the individual wires. You will need to expose wires for pins 4,5,7,8 & 9. Use an ohm meter to determine which wires are which. Trim back the sides of the plug as shown in the picture. Use your Vectrex controller plug as a reference as you do this. Then from this new cable, solder pin 7 (+5V) wire to the unconnected side of the left resistor, solder pin 9 (-5V) wire to the unconnected side of the right resistor, and solder pin 5 wire to the center (pot's wiper arm) solder point on the potentiometer. [Refer to picture of assembled paddle above] For the red button, solder pin 8 (GND) wire and pin 4 (Button #4) wire to its two contacts. It's suggested that mapping the paddle's button to the Vectrex's button #4 preserves functionality with the Hyperchase game. Reassemble and do some experimenting. Put a paint mark on the paddle for "top dead center" so you will have a reference point to return to when playing Hyperchase. |
|
What about the other 3 buttons? You can wire extra buttons in a separate case and connect via a splitter or in series with this controller for other Hyperchase functions. You can also make a special "Left Right Thrust Fire" (LRTF) 4 button controller and mounting a 9 pin DIN male port to accommodate the Vectrex paddle controller for the Hyperchase game. Then you'll be able to plug any future controller into this LRTF controller (which has its own cable and is plugged into the Vectrex), and have access to all 4 buttons on a convenient pad. |
|
| Anyone wishing
to have one of these special controllers should email Rob
Mitchell directly. Also, you can read the Paddle FAQ for more paddle related information. |
|
|
|
Home - Vec Store - VecTech - Shop Talk - Preserves - Game Room - Design It - Portals - E-Mail